Laravel PHP Licenser & Updates Manager - REST API, webhooks, customer portal


Vendor KYV (Know Your Vendor)
PluginVendor KYC — Botble Marketplace Plugin
Overview
Vendor KYV adds a complete identity verification system to your Botble marketplace. When enabled, vendors must submit their KYV documents and receive admin approval before they can access their store dashboard.
The plugin takes full control of vendor verification and automatically disables Botble's built-in verification system so there are no conflicts or duplicate waiting pages. Verified vendors have no restrictions and use the dashboard normally.
Requirements
- Botble CMS 7.5.0 or higher
- Marketplace plugin (installed and active)
Installation
- Upload the
vendorkycfolder toplatform/plugins/ - Log in to your admin panel and go to Admin → Plugins
- Find Vendor KYC in the list and click Activate
- The database table is created automatically on activation
- Go to Admin → Vendor KYC → Settings
- Toggle Enable Vendor KYC Verification on and click Save Settings
That is all. Botble's built-in vendor verification is automatically disabled when you save.
How It Works
Vendor Flow
- A customer registers and creates their store on your marketplace
- Their store is automatically placed in Pending status
- When they try to access their vendor dashboard, they are redirected to the KYC verification page , a clean standalone page completely separate from the dashboard
- The page shows them their current verification status and what documents are required
- They click Start Verification and complete the 3-step form:
- Step 1 - Personal Information: Full name, date of birth, nationality, business address
- Step 2 - Documents: ID type selection, ID expiry date, front photo of ID, back photo of ID (not required for passport), selfie holding their ID, and optional business certificate if enabled by admin
- Step 3 - Review: A summary of everything before final submission
- After submitting, the verification page updates to a pending status card showing their submission details and submitted date
- The admin reviews and either approves or rejects
- On approval the vendor receives an email, their store is published, and they get immediate full access to the dashboard.
- On rejection the vendor sees the reason on the verification page and can resubmit with corrected documents Vendor will also receive an email on rejection.
Admin Flow
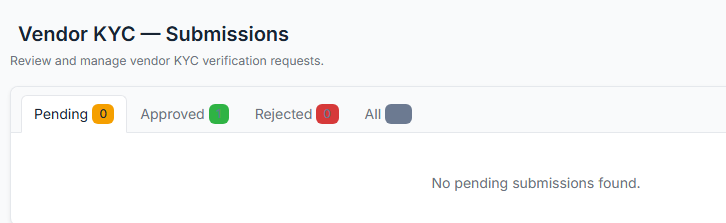
All KYC management is under Admin → Vendor KYC in the sidebar.
Submissions list shows all vendor submissions with tabs for Pending, Verified, Rejected, and All. Each row shows the vendor name, store name, submission date, and current status badge.
Submission detail page shows the full submission including all personal information, uploaded document photos, ID type, ID expiry date with colour-coded badges for expired or expiring soon IDs, and the store and customer details. From this page you can approve or reject.
Approve sets the vendor's KYC status to Verified, publishes their store, stamps vendor_verified_at on their customer account, and sends them an approval email. They can access the full dashboard immediately.
Reject sets status to Rejected, optionally records a reason, and sends the vendor a rejection email with your reason. The vendor can see the reason on their verification page and resubmit.
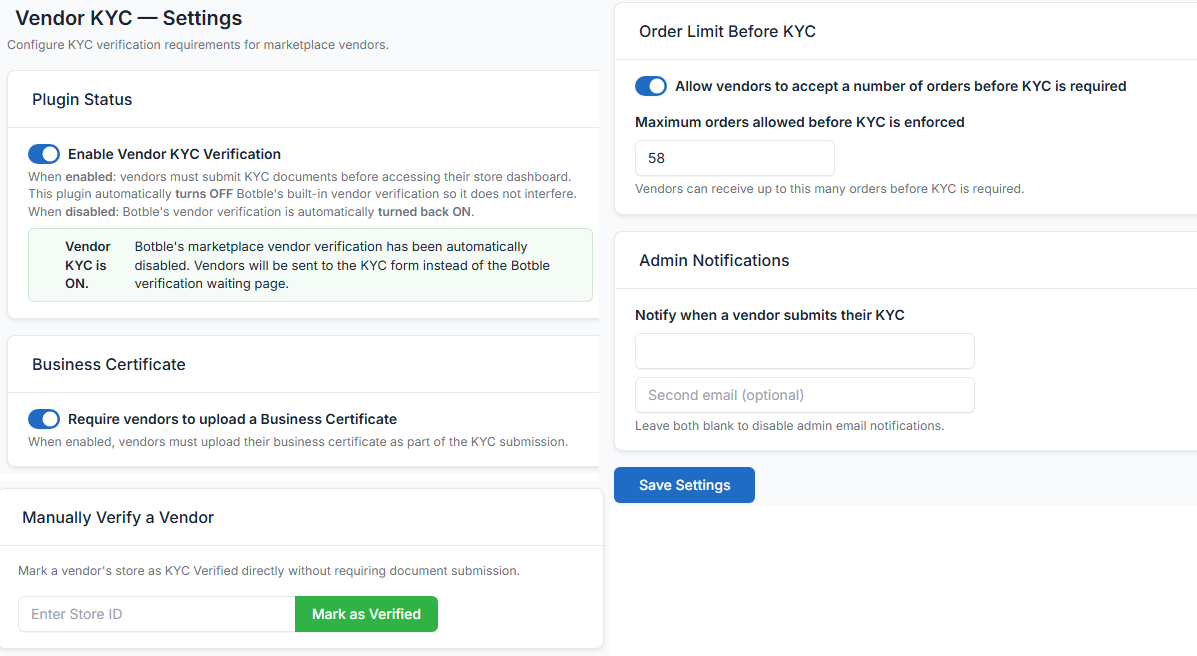
Manual Verify on the Settings page lets you enter any Store ID and mark that vendor as KYC Verified without requiring document submission. Useful for existing vendors or trusted partners.
Delete submission removes the KYC record and all uploaded document files, resetting the vendor back to unverified status.
Settings
All settings are at Admin → Vendor KYC → Settings.
Enable Vendor KYC Verification
The master on/off switch. When turned ON, Botble's built-in marketplace vendor verification (marketplace_verify_vendor) is automatically set to disabled so vendors are not sent to Botble's waiting page. When turned OFF, Botble's verification is automatically re-enabled. You never need to touch Marketplace Settings manually.
Require Business Certificate
When enabled, vendors must upload a business certificate file as part of Step 2 of the KYC form. Acceptable formats are JPG, PNG, and PDF up to 5MB. When disabled, the business certificate field does not appear on the form.
Order Limit Before KYC
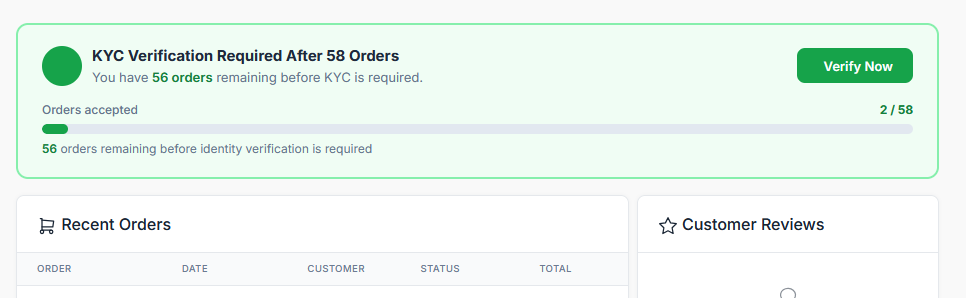
Allows vendors to start receiving and managing orders immediately, up to a maximum number you define, before KYC is enforced. Useful if you want new vendors to get started right away but still require identity verification before they scale.
- Enable the toggle and enter the maximum number of orders
- Vendors under the limit have full dashboard access with an order progress banner showing how many orders they have used and how many remain
- Once they reach the limit, the KYC wall activates and they must complete verification before continuing
- Setting the limit to 0 or leaving it blank disables the grace period
Admin Notification Emails
Enter up to two email addresses to receive a notification whenever a vendor submits their KYC documents. Both fields are optional, leave them blank to disable admin email notifications entirely.
Leave a comment
Your email address will not be published. Required fields are marked *
Nice concept

Glad you like the idea

Is their any any custom fields like uploading more documents to verify
Appreciate the feedback. Custom fields are planned for a future update. The plugin works great as-is for now.

In this plugin admin can create custom fields for vendors verification. For example admin need more information about vendor like GST, vat, import export license etc.
Thanks. Just to clarify, custom fields aren't supported yet, but they're planned for a future update. Appreciate the feedback